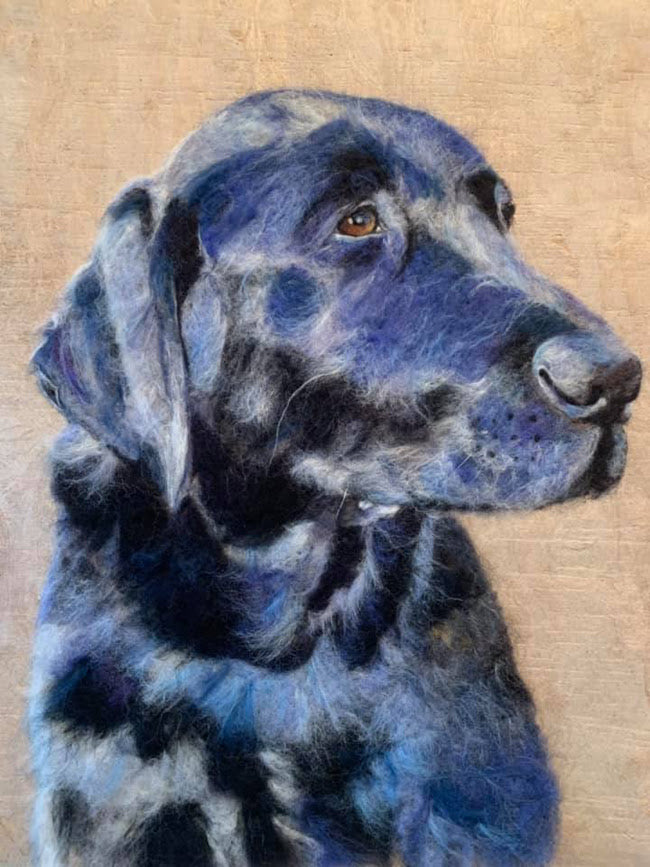
This tutorial will show you how to create a needle felted dog portrait from a photo. It begins with a cardboard stencil. Next, you should felt the wool using thin layers. This prevents any needle holes, but it will also help you to avoid lumps and bumps. Then, add various fibres to create the dog's face. You can use carding, layering, or your hand to blend the colours and create a more realistic look.

Start by creating a silhouette of the dog. Then, take a tracing paper and a smudge of iron-on transfer pen. Alternatively, you can use a sunny window. Remember to keep the wispy pieces within the outline of the animal, because otherwise, they won't be covered by wool. You can always add details later. While you're at it, don't forget to feel the highlights and edges of the animal's face.
After the outline is completed, add the markings. If the dog has any, you can put glass eyes on wire stems. You can also use beads or roving fiber. Ensure the eyes have a natural glow by using shiny fiber, such as silk. This process takes less than an hour, and a small needle felted dog can be finished in a matter of minutes. It's important to feel the edges and highlights to make sure that the dog is well represented.
Once the dog is finished with its facial features, it's time to add the eyes and nose. This part is the most important part of the portrait, so don't leave it out! After finishing the face, you'll want to finish the top of the head and the ears. You'll want to leave some space between the nose and the eyes to fill them in. And don't forget to complete the body frame and the nose.
The next step in making a needle felted dog portrait is to create the dog's body and legs. Then, you will need to add the hair and markings of the dog's tail. You can also add the eyes by twisting the ends of the fibers. If you have a dog with a coat, you will need to cut the hair. The last step is to needle felt the top of the head.
Once the dog's head is finished, you can continue by working on the fur around it. To make a needle felted dog portrait, you can use the same technique that you used for a cat. Once you've finished the head, you can start working on the eyes, nose, and mouth. Your pet's hair will look soft and fluffy and your needle felted portrait will look wonderful!
Once you have the basic shapes for your pet, you can add details and colors. You can also add a few details to the face by twisting the ends of the fibers. Once you've finished with the mouth and eyes, you can proceed to the body frame. You'll need to make the head and hair of your pet. To finish your needle felted dog portrait, you'll need to trim the coat and the ears.
Once you've completed the body frame and the dog's face, you can add details like the eyes. If your pet has any markings, don't worry if your markings look too defined. You can fill in the coloring with beads and roving fiber. If you're creating a needle felted dog portrait of your favorite pet, you can use a ruler to measure the parts of the body frame.
Once you've finished the body frame, you can add the details. The first step in making a needle felted dog portrait is to draw the outline on paper. This will help you determine the color of your pet's face. To create a realistic pet portrait, you should use colors that complement the animal's coat. This technique is ideal for small dogs because it takes very little time. However, it is not as simple as it seems and it requires a lot of practice.


