Using a pair of sharp scissors, cut the body and the coat into shape, then trim the head. Then, using tweezers, bend the pipe cleaners and secure the whiskers. Now, feel the head and tail. Use the needle to create the 'trunk' of the dog, the area where it sits on the ground. Once you've completed these steps, you're ready to begin needle felting.
To needle felt a dog's head and tail, start by wrapping the pipe cleaner in the appropriate felt and inserting a needle. Next, attach the snout. Then, insert the eyes, nose, and mouth with the help of a felting needle. To make the body, attach the paw pads with black wool and add some detail. Once the main body is complete, it's time to add the finishing touches.
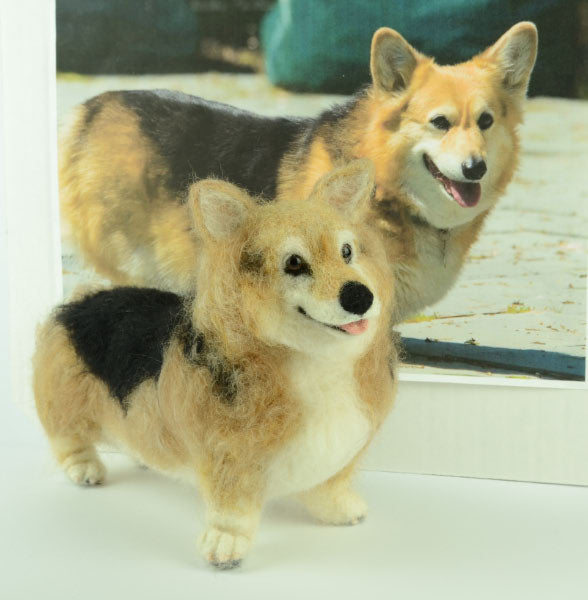
To add realistic features to a needle felted dog, start by making the body of the dog with black fiber. Fold the pipe cleaner and make the legs and toes into the main shape. After the body is completed, start adding the long fibers to the feet and paws. After the body is completed, you can add the legs and the head. Glue the eyes and the nose, then stitch the body.
Once the body is complete, you can add accessories and customize the dog's appearance. After it is felted, you can reposition the dog's head and snout and make it look more like a real one. If you want to make a needle felted cat, you can also change the nose and mouth with black wool. It may take a while to complete, but the result is worth the effort.
After creating the body and limbs, you can start the body by using a single pipe cleaner as the frame. The fibers of the pipe cleaners make it easier to catch wool roving while needle-felting. If you have no pipe-cleaner skills, use a wire cutter or needle. If you want to needle-felt a dog from a real dog, the fibers should be at least 24 gauge.
You can begin needle-felting a dog by using pipe cleaners covered in wool. Then, you can add a face by combining a pipe cleaner with black wool. Once you've finished the head, you can add the eyes, snout, and ears. Afterwards, you'll need to make the eyes, nose, and paws. After you have the face and paws, you can add the eyes and ears.
Once you've created the body and head of the dog, you'll need to create the tail. The tail of the dog is a vital component in the overall picture of the animal. To make the fur on a dog, you need to create a tail with long fibers. You can also add a tail to the model by needle-felting. When you're finished, you'll need to cut the tail and head of the animal so it fits inside the sculpted body.
If you've completed the head, you can then move on to the next step: the paws. Now that you've completed the paws and head, you'll need to make the snout and the eyes. You can also add a nose and paw pads. Don't forget the details! It's easy to get confused in needle felting. There are many techniques and tools that can help you create a realistic dog.
After you've finished needlefelting the paws, you can now make the head of the dog. The paws are made by needle-felting the fibers at the root of the hairs. Afterwards, you can add toes and paw pads. Then, you can finish the dog by attaching the eyes and nose. You can also create a realistic looking nose and mouth by adding colors to the fur.
Using a pair of sharp needles, you can create a realistic dog by tracing the correct legs of the dog. You can also add the correct coat markings. Ensure that the wires stay in place. Then, you can shape the fiber edges and the fibers along the shape lines. Once the eyes are done, you can proceed to the next step, the body. You can add a head and legs to the needles, and then glue them together.


